
At work, I manage a repository for a front-end application, which includes Markdown files that are compiled into a documentation portal.
Documentation, especially in Markdown format, is more than just words on a page. In my case, it's a user's guide, a developer's reference, and sometimes, even a product's first impression. Therefore, ensuring its quality, consistency, and accuracy is critical, and this is where Markdown linters come into play.
Essential Tools for Markdown Linting I Used
Our approach involves three key tools, each serving a unique purpose:
Markdownlint: For stylistic consistency and syntax correctness.
Markdown-link-check: To validate all hyperlinks are functional.
cspell (Code Spell Checker): For ensuring correct spelling throughout your documentation.
In my case, we used to run these linters on each pull request/commit that was uploaded to the repository.
Linters
Markdownlint:
npm install markdownlint-cli
Ensures Markdown files follow best practices and maintain a consistent style. Of course, as anything the following different rules, it can be customized to your needs.
Markdown lint follows its defined rules, you can find it here.
To modify it, you can use a configuration file, .markdownlint.json, which can be placed in the root of your repository.
For example:
{
  "MD001": false,
  "MD013": false,
  "MD028": false,
  "MD029": false,
  "MD036": false,
  "MD033": {
    "allowed_elements": ["iframe", "url"]
  }
}
This config file ignore certain rules defined by the tool, and allows specific elements that are not allowed by default.
Markdown-link-check:
npm install markdown-link-check
Checks for broken links in your Markdown files, ensuring all external references are valid. Note that this tools fails to check internal links from obvious reasons, therefore you can configure it to ignore them.
You can use mlc_config.json file to configure the tool, and place it in the root of your repository.
{
  "ignorePatterns": [
    {
      "pattern": "^https://github.com/myorganization/"
    }
  ]
}
myorganization is the name of your organization in GitHub in this example.
cspell:
npm install cspell
Catches spelling mistakes, a critical aspect of maintaining professional and clear documentation. Although sometimes you might have words which aren't really a typo, but are not in the dictionary, therefore you can add them to the dictionary.
You can use cspell.json file to configure the tool, and place it in the root of your repository.
{
  "words": ["tizen", "webos"],
  "ignoreRegExpList": [
    "\\!\\[[^\\]]*\\]\\([^)]*\\)",
    "(?<=```[\\s\\S]*?)\\S+",
    "\\[.*?\\]\\(https?://[^\\)]*\\)"
  ]
}
Note that I also added regex expression to ignore certain patterns, such as links, code blocks, and images alt text.
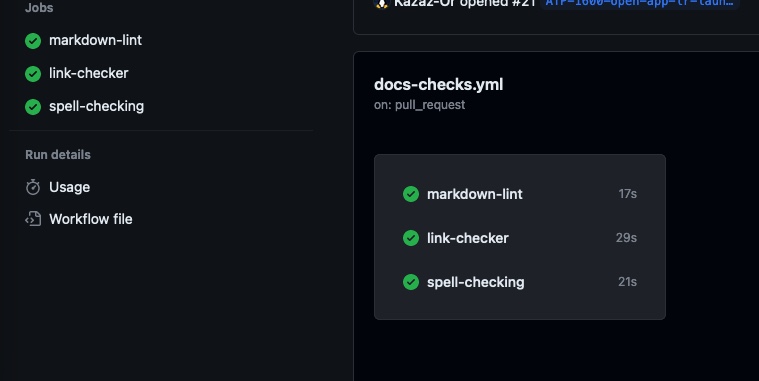
Setting Up GitHub Actions Workflow
Integrating these tools into a GitHub Actions workflow ensures that every pull request adheres to your documentation standards. Here’s how you can configure the workflow for each tool:
name: Documentation Checks

on:
  pull_request:
    paths:
      - 'docs'
      - 'docs/**'

jobs:
  markdown-lint:
    runs-on: ubuntu-latest
    timeout-minutes: 5

    steps:
      - name: Checkout
        uses: actions/checkout@v3
        with:
          fetch-depth: 0

      - name: Setup-env
        uses: ./.github/actions/setup-env
        with:
          node-version: '18.16'

      - name: Run markdownlint
        run: npm run lint

  link-checker:
    runs-on: ubuntu-latest
    timeout-minutes: 5

    steps:
      - name: Checkout
        uses: actions/checkout@v3
        with:
          fetch-depth: 0

      - name: Setup-env
        uses: ./.github/actions/setup-env
        with:
          node-version: '18.16'

      - name: Run markdown-link-check
        run: npm run link-check

  spell-checking:
    runs-on: ubuntu-latest
    timeout-minutes: 5

    steps:
      - name: Checkout
        uses: actions/checkout@v3
        with:
          fetch-depth: 0

      - name: Setup-env
        uses: ./.github/actions/setup-env
        with:
          node-version: '18.16'

      - name: Run cspell
        run: npm run spell-check
This is a simple workflow that runs on every pull request, and runs each linter separately. In this case I specified the paths to the docs folder, but you can change it to your needs.
In the beginning of the workflow, I used a very simple composite github action to install node and npm, and then run the linters so i won't have to duplicate the same steps in each job. It's a simple action, but it's very useful, you can improve it to your needs.
If your'e interested in the composite action, here it is:
name: 'Setup Environment'
description: 'Checkout and setup Node.js'
inputs:
  node-version:
    description: 'NodeJS version'
    required: true
    default: '18.16'

runs:
  using: 'composite'
  steps:
    - name: Setup Node
      uses: actions/setup-node@v3
      with:
        node-version: ${{ inputs.node-version }}

    - name: install dependencies
      shell: bash
      run: npm install
By integrating these Markdown linters into your GitHub Actions workflow, you elevate the standard of your project's documentation. This setup not only ensures consistency and correctness but also encourages a culture of quality and attention to detail within your development team. Remember, good documentation reflects the quality of your code and your commitment as a developer.


